Setup Your Header Background
THEME: Business Approach
There are 2 ways to update your header background. A shorter way and a longer way – both are beneficial depending on where you are at in updates.
It is best to use the shorter way when you’re already on this page or you’re on the On-boarding Checklist page as you will already have the link straight to the header layout template.
We’re also giving you the longer way method so that you can update your header background wherever you are on your site. You won’t need to look for this tutorial or go back to the On-boarding checklist.
Shorter Way:
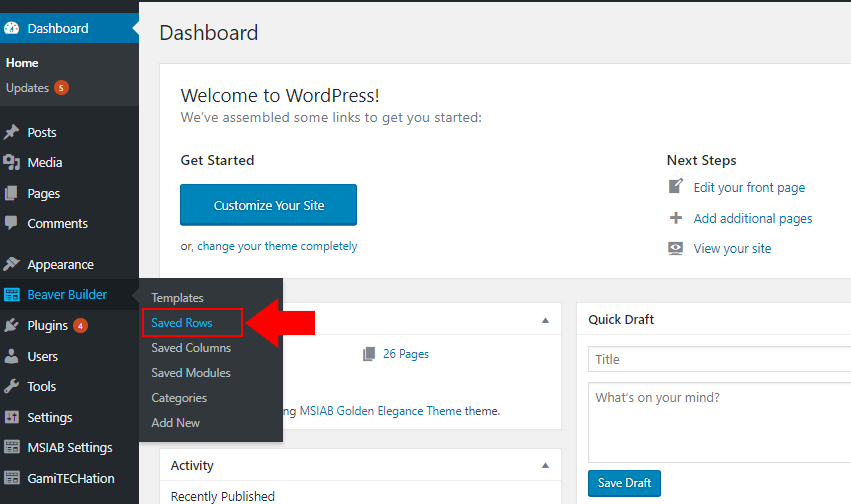
1. In the Admin page, hover on Beaver Builder menu then select ”Saved Rows”
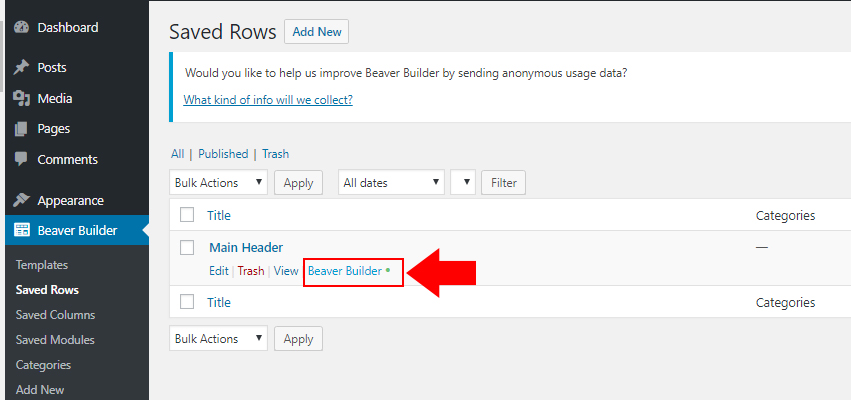
2. Hover on “Main Header” then click on “Beaver Builder” link.
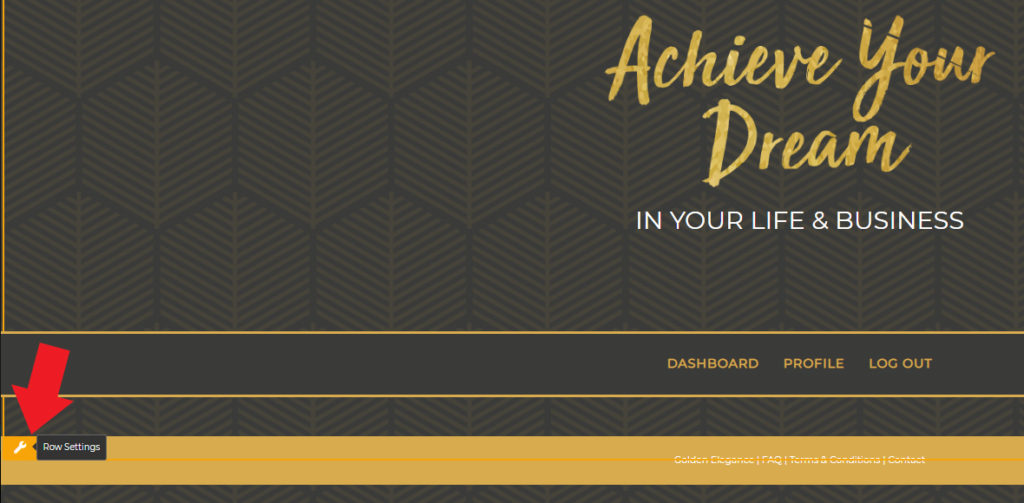
3. Click on wrench icon(Row Settings).
4. Click “Edit” from the popup screen.
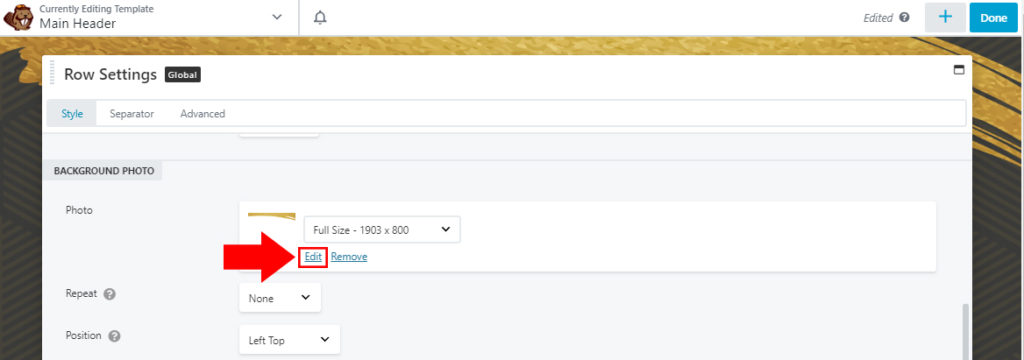
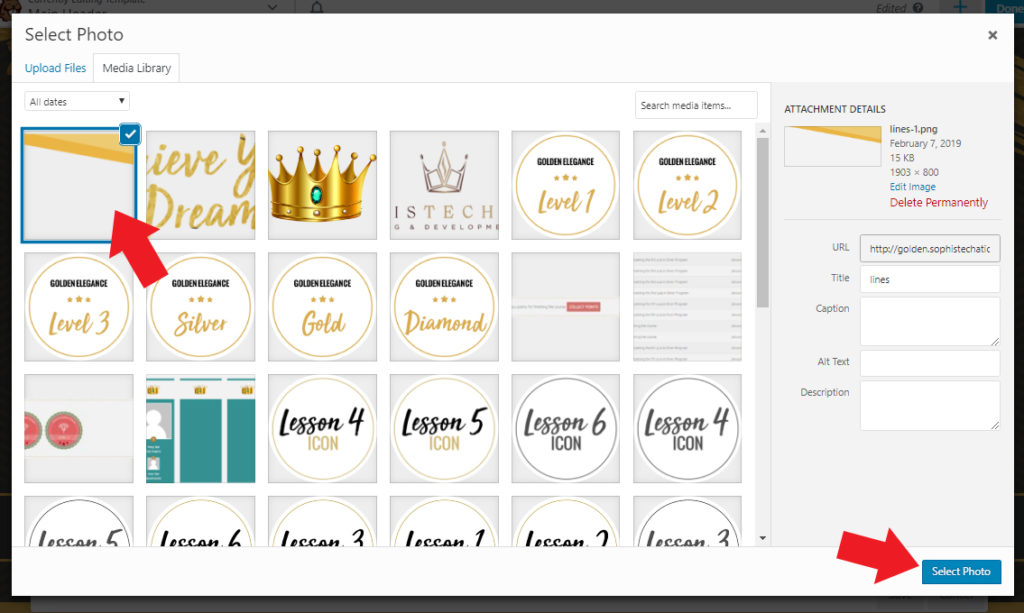
5. Upload header background then click on “Select Photo” button.
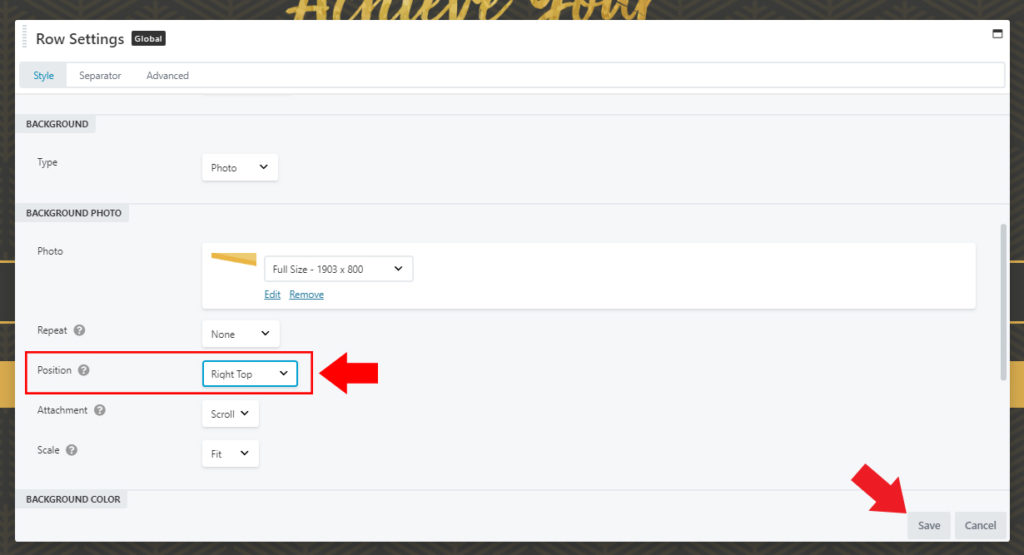
6. Adjust the position of the header background to your liking then click on “Save” button.
7. At the top right corner click on “Done” button.

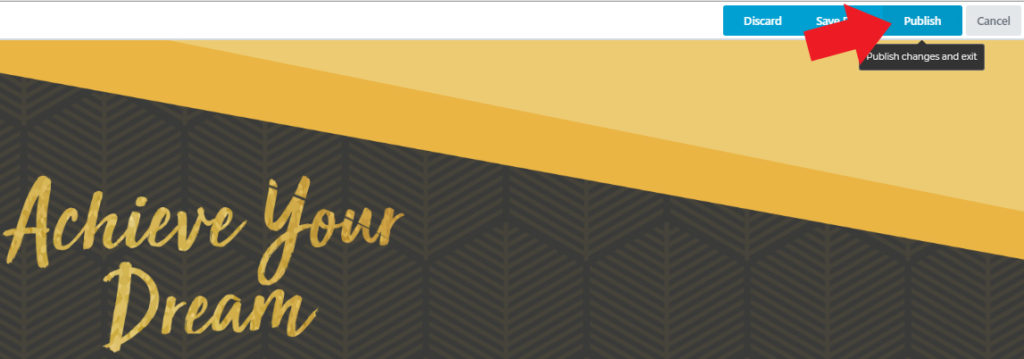
8. Then click “Publish” button.
Longer Way
1. Anywhere on the site, (except admin pages), you will be able to find “Beaver Builder” at the center top of the page. Go ahead and click on that.

2. Now click the wrench icon(Row Settings).