Setup Your Access Automation
STAND ALONE COURSE (Instant Access to all content)
After building your Standalone Course in AccessAlly, it’s time to set up the corresponding CRM automation. Without this step, your online courses and students will not sync properly with your CRM, and there will be no way to automate the course.
STEP 1
Locate The CRM Automation Guide Inside AccessAlly
The “Guide” to setting up your CRM automations is built inside your AccessAlly plugin.
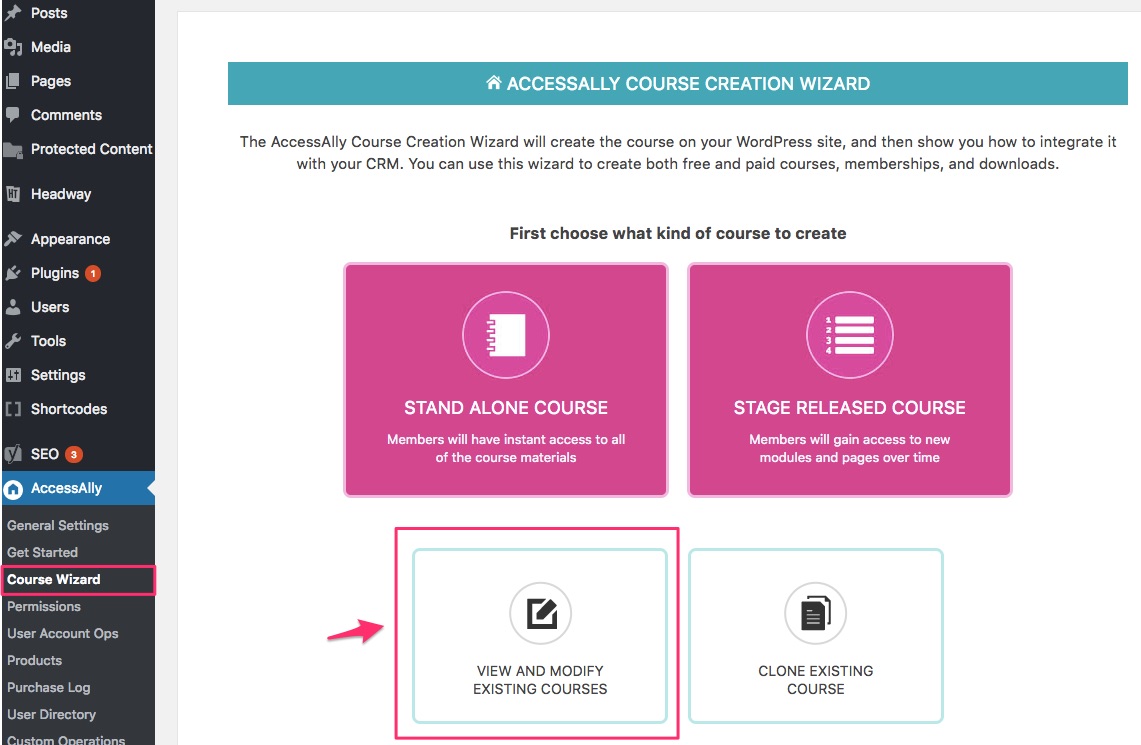
To locate it, go to the AccessAlly Course Wizard > Edit/Modify Existing Courses.
STEP 2
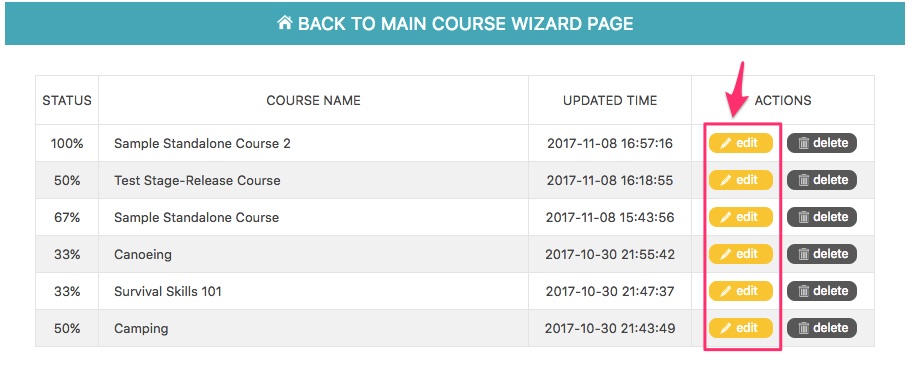
Here, you can choose the course you’d like to create the CRM automation for by clicking on the “EDIT” button.
STEP 3
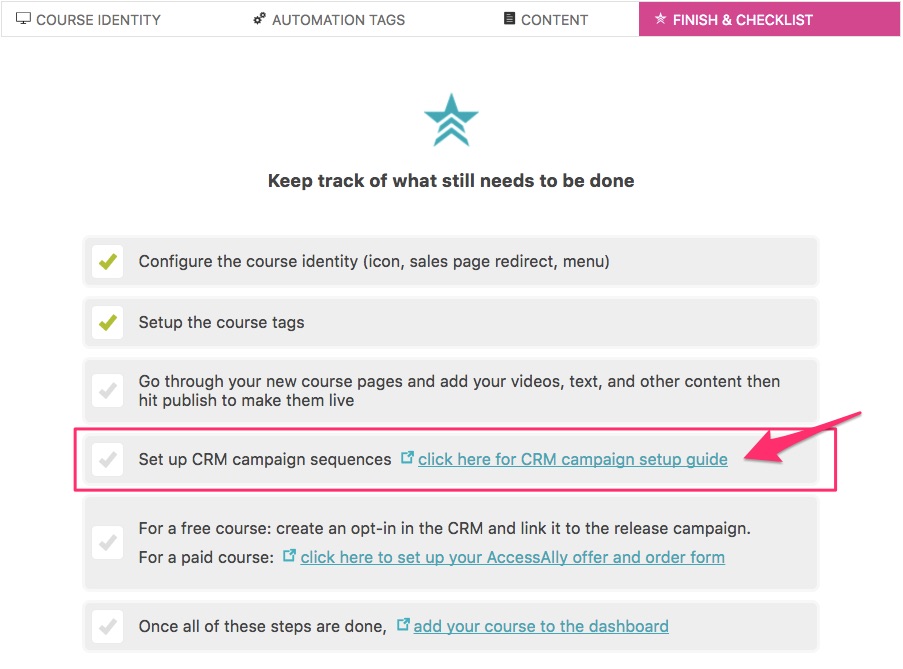
If you have fully set up the course pages as instructed in the previous tutorial (Setup your Programs & Courses), the edit button will take you to the Checklist.
Click on the link for “click here for CRM campaign setup guide”.
STEP 4
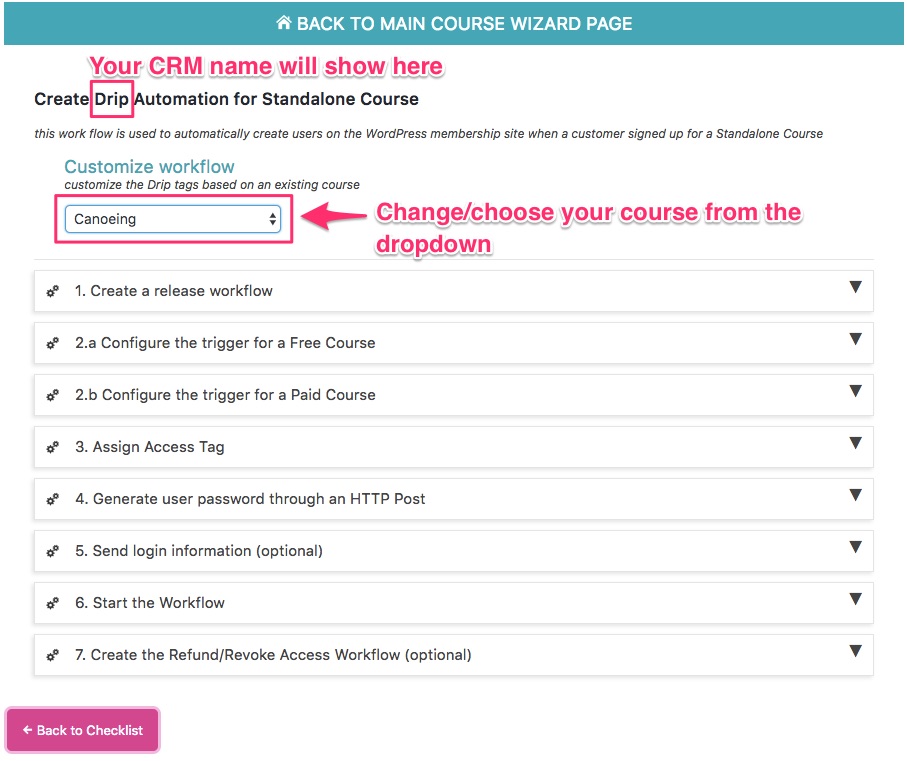
Now, you’re inside the CRM automation setup guide. Here, you can see at a glance which CRM you’re integrated with and which course you’re building out the CRM automation for.
If you would like to change courses, just select the correct one from the dropdown menu.
STEP 5
Follow Your Specific CRM Instructions
The CRM Automation Guide will walk you through each step of the setup process. It’s recommended that you use the Guide inside your membership site (as opposed to the next part of this tutorial), as the links and tags you need are dynamic and will match up with the course you’re building.
STAGE RELEASED COURSE (Dripping Access to content)
After building your Stage-Release Course in AccessAlly, it’s time to set up the corresponding CRM automation. Without this step, your online courses and students will not sync properly with your CRM, and there will be no way to automate the course.
STEP 1
Locate The CRM Automation Guide Inside AccessAlly
The “Guide” to setting up your CRM automations is built inside your AccessAlly plugin.
To locate it, go to the AccessAlly Course Wizard > Edit/Modify Existing Courses.
STEP 2
Here, you can choose the course you’d like to create the CRM automation for by clicking on the “EDIT” button.
STEP 3
If you have fully set up the course pages as instructed in the previous tutorial (Setup your Programs & Courses), the edit button will take you to the Checklist.
Click on the link for “click here for CRM campaign setup guide”.
STEP 4
Now, you’re inside the CRM automation setup guide. Here, you can see at a glance which CRM you’re integrated with and which course you’re building out the CRM automation for.
If you would like to change courses, just select the correct one from the dropdown menu.
STEP 5
Follow Your Specific CRM Instructions
The CRM Automation Guide will walk you through each step of the setup process. It’s recommended that you use the Guide inside your membership site (as opposed to the next part of this tutorial), as the links and tags you need are dynamic and will match up with the course you’re building.